Bean There Sewalong Introduction, Week One
Note: This post may contain affiliate links. That means we may earn a commission at no additional cost to you if you purchase via our links. Not all links are affiliate links. I only recommend products I use and trust. As an Amazon Associate, I earn from qualifying purchases.
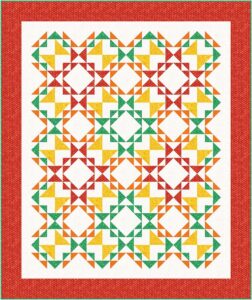
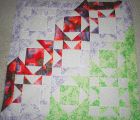
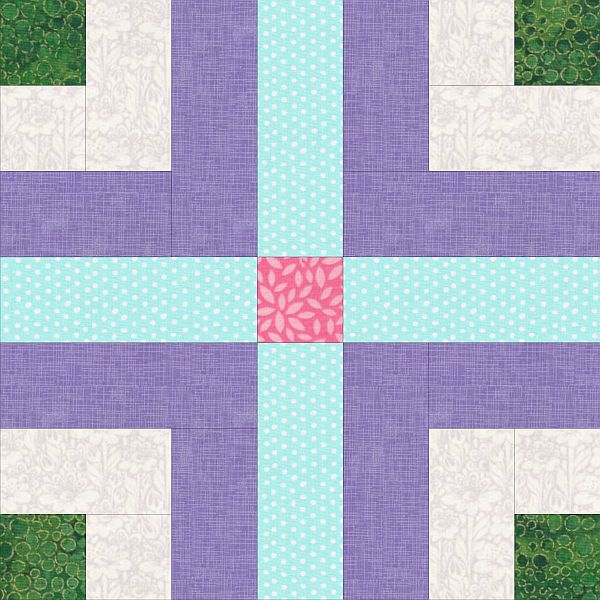
Here’s the quilt we are making. I’m calling it Bean There because it is created using the Corn and Beans block. Although that block can be made entirely of HSTs, I am not going to do that in this sew along.
Although I suppose you could. I wasn’t going to put those instructions in this sewalong, but really it’s no big deal. Just a lot of sewing and squaring up.
And, as always, if you send me a picture of any step in the process, I will send you the final pattern. My email address is moc.liamg@sngisednoomebeohp
Here’s My Plan
- Week One: Making HSTs using Magic
- Week Two: all three methods are presented, but you will only be making one color each week. This week will be Cat’s Cradle Color One. The methods being presented are:
- Cat’s Cradle: using HSTs Method 1
- Cat’s Cradle: using HSTs Method 2
- Cat’s Cradle: using corner squares
- Week Three: Cat’s Cradle Color Two
- Week Four: Cat’s Cradle Color Three
- Week Five: Catch-up and Cutting
- Week Six: all four methods are presented, but you will only be making one color in Week Six. The methods being presented are:
- Flying Geese Method 1 (traditional) and Flying Geese Method 2 (HSTs)
- Flying Geese Method 3 (no math) and Flying Geese Method 4 (quilt in a day)
- Week Seven: Flying Geese Color Two
- Week Eight: Catch-up and Cutting
- Week Nine: Putting the Blocks together
- Week Ten: Adding the Borders.
Here are the blocks
This is an HST (half-square-triangle) block. No matter which method you choose for the Cat’s Cradle and the Flying Geese, you will need to make 160 of these in three different colors. These will be made in Week One. I will be suggesting the Magic Eight method, but you can choose any method you like.
This is a Cat’s Cradle block. Method 1 will simply use HSTs. Method 2 will be the method used in Follow Me Fish and the Shaded Four-Patch method. Method 3 will be almost the same thing, but you will start with HSTs in the corner. You don’t NEED the Creative Grid Cat’s Cradle ruler as I will show you how to draw the lines without it, but it will make your life a little easier.

This is a Flying Geese block. There are so many different ways of making flying geese blocks! In fact, I wrote an entire e-book called Strolling Geese on the topic. But to keep this sewalong simple, I am only going to show the two Traditional Methods, the No Math Method, and the Quilt-in-a-Day method.
If you have, or can borrow, the Lazy Girl No Math ruler or the Wing Clipper Ruler , and the Quilt in a Day Flying Geese ruler you will find them helpful. They are NOT required.
Fabric Requirements
Because you have so many choices, I am reluctant to give exact fabric requirements. Here is my suggestion, although be aware you may need more. Especially if you are experimenting along the way. That’s really the best way to learn a new technique, but it can be hard on the stash.
Here are my choices:
- 3-1/2 yards Background
- 1-1/4 yards Green Leaves
- 3/4 yard Pumpkin Orange
- 3/4 yard Sunflower Gold
- 2 yards Red Berries
I can’t give you cutting instructions ahead of time for anything other the the units that will be made no matter which method you choose. Those would be the HST corners.
Week One
Here are the 2-1/2″ unfinished HSTs that you will need:
- (16) Green/Background HSTs ,
- (32) Red/Background HSTs, and
- (112) Orange/Background HSTs.
If you are using the Magic Eight method of making HSTs, you will need:
- Background: (20) 6″ squares
- Green: (2) 6″ squares
- Red: (4) 6″ squares
- Orange: (14) 6″ squares
Put these in a baggie or some other safe place so you don’t get them mixed up with next weeks HSTs.
Sewalong Schedule
- Introduction
- Week One: 5/10/25. Making HSTs with Magic
- Week Two: 5/17/25. Three Methods of Making the Cat’s Cradle block.
- Week Three: 5/24/25. Making the Cat’s Cradle Red Blocks
- Week Four: 5/31/25. Making the Cat’s Cradle Green Blocks
- Week Five: 6/7/25. Catchup and Cutting Ahead
- Week Six: 6/14/25. Ten Methods of Making Flying Geese Blocks
- Week Seven: 6/21/25. Making More Flying Geese
- Week Eight: 6/28/25. Catchup and Sewing Ahead
- Week Nine: 7/5/25. Finally putting the blocks together
- Week Ten: 7/12/25. Adding the borders and finishing. Whew!
If you would prefer to work from a pattern, it is available here.