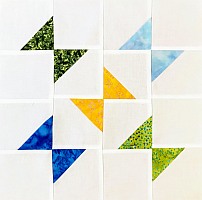
Kite with tail Quilt Block
Note: This post may contain affiliate links. That means we may earn a commission at no additional cost to you if you purchase via our links. Not all links are affiliate links. I only recommend products I use and trust. As an Amazon Associate, I earn from qualifying purchases.
Here’s the Kite Quilt Block for #QuiltBlockMania. It’s a clever little block that looks great in a variety of scraps. Fast, easy, and fun to make!
The pattern is available for free to subscribers at the bottom of the page. If you’d rather just print, click the green Print Friendly button under the designer list. If that doesn’t work, try Ctrl + P (or Flower + P) to bring up the printer dialog box.
Catch that Kite Quilt Block
Before starting this project, I recommend that you press your fabric with spray sizing. It will make it easier to cut small pieces. Take the time to clean your machine, put in a new needle, and fill a few bobbins. When pressing, just hold the iron over a spot for a moment or two. This pattern assumes a perfect 1/4” seam.
In this pattern, you have the option of using a specialty ruler, called an On-Point Ruler by Quilt in a Day to make the Triangle in a Square block. (You can also use the Accuquilt die #55770 ) The piecing of this block is tricky the first time. I suggest you make a practice block out of scraps first.
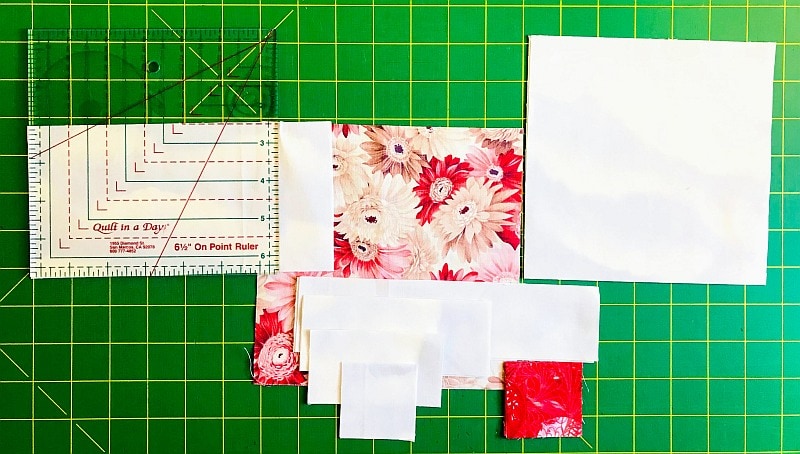
Fabric Requirements and Cutting Instructions
Kite Fabric
(1) 7″ square
Various colors for the tail
(4) 2″ squares
Blue Sky
Cut (1) strip 6-1/2″ wide by the Width of Fabric. From that strip, cut (2) 6-1/2″ squares, (2) 2″ × 5″ rectangles, (2) 2″ × 3-1/2″ rectangles, (2) 2″ squares and (2) 4″ × 8″ rectangles
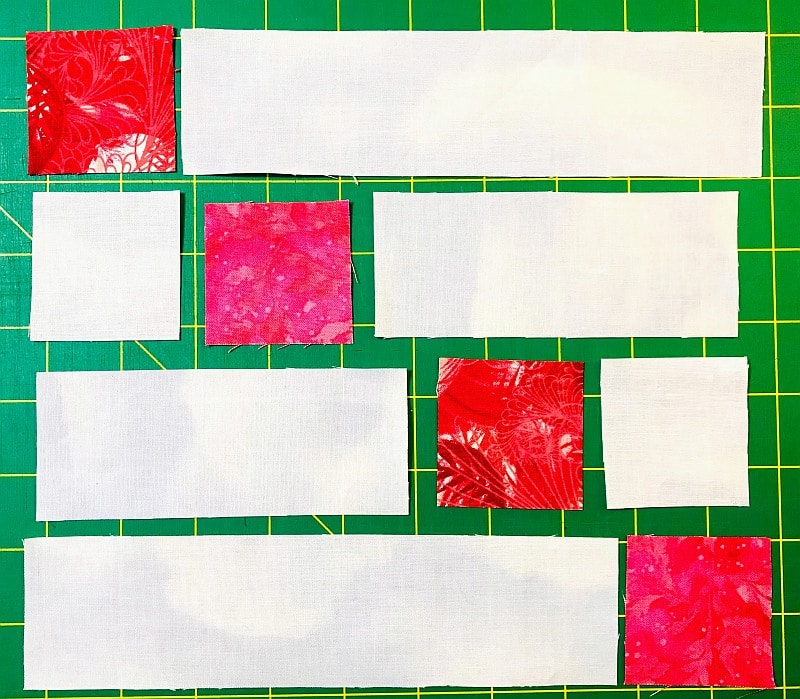
Making the Kite Tail
My sample is made using various shades of red and pink. Sew them in the order shown below, pressing toward the dark. (Details in the pattern.) Press and square up this block to 6-1/2″ when you are done.
Making the Kite
You will need the 7″ Kite Square and both 4″ × 8″ Sky rectangles.
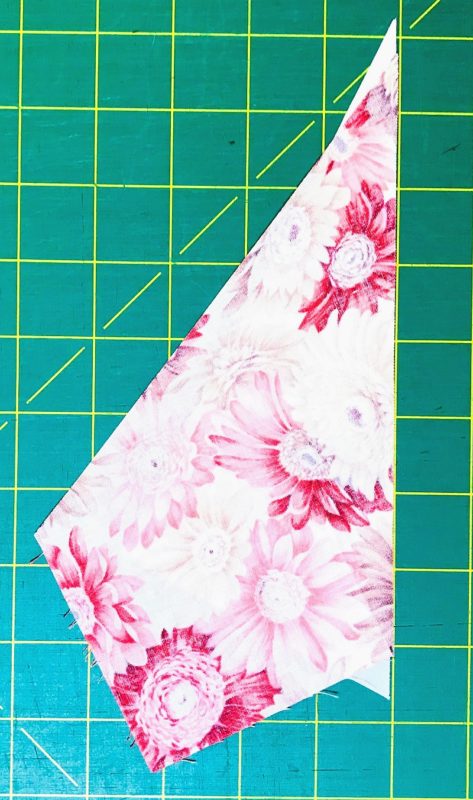
Fold the 7″ square into quarters. That will help you mark the center edge of the block. Cut from your mark to the opposite corner of the block. Discard the corner triangles or save them for another project.
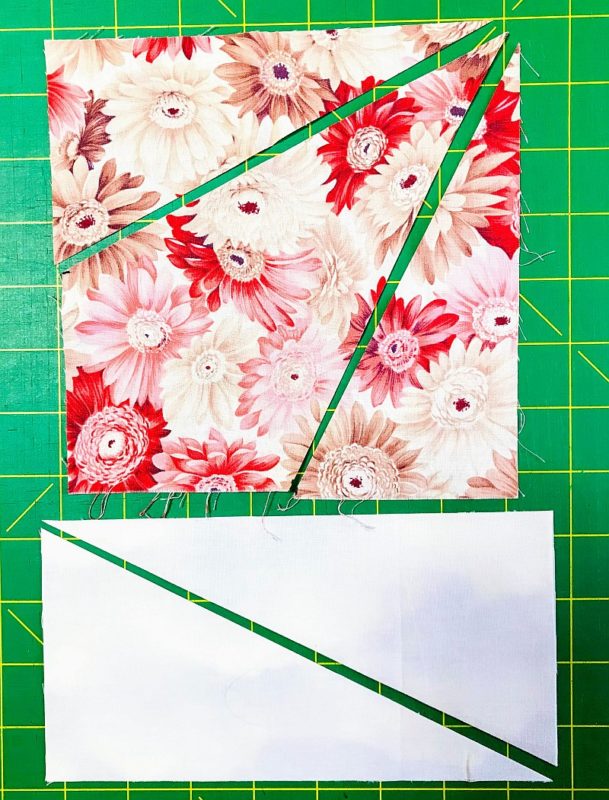
Cut two 4″ × 8″ Sky rectangles on the diagonal as shown above. These half-rectangles will be sewn onto the sides of the Kite center that you just made. You will need one half-triangle from each group because of the angle—one for the left side and the opposite angle for the right side. (If you cut these in pairs, right sides together, you will automatically get the two angles.)
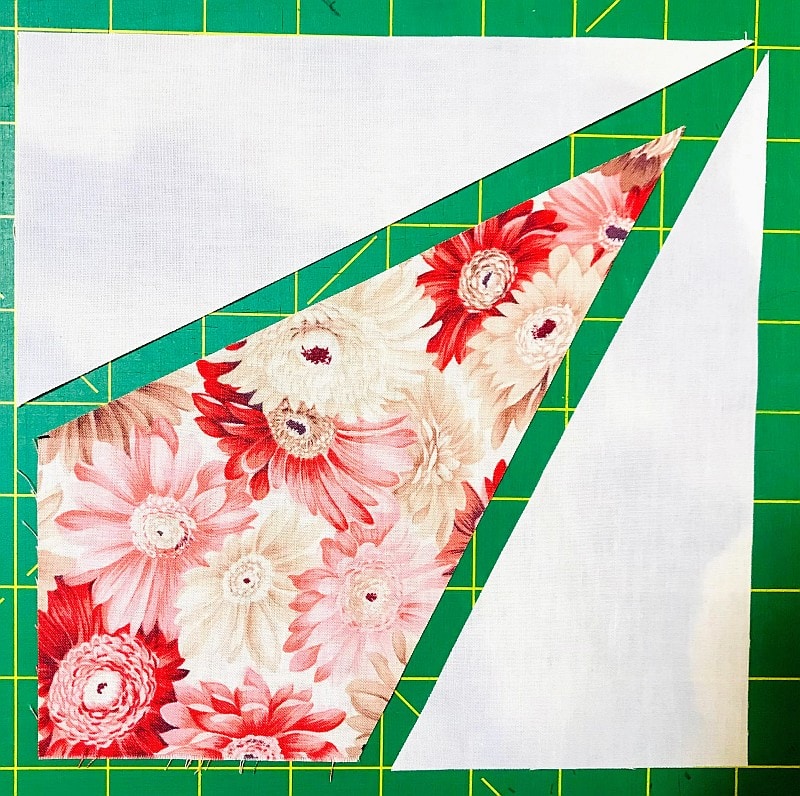
Place the center Star-Point face down on the left side half rectangle. Slide it up by 1/4″. This gives you a little notch to show you where to begin your seam. Notice that the tail of the half-rectangle hangs over by a bit. That’s okay. You will trim it later when you square up the block.
Sew this seam and press it to the half-rectangle.
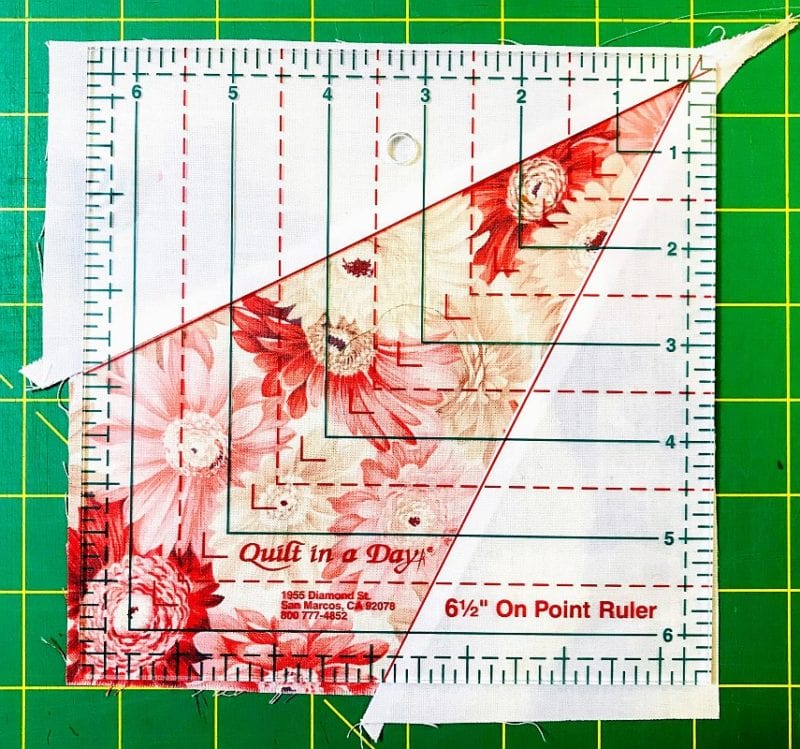
Repeat with the right side, pressing toward the star point. Square up to 6-1/2″, taking care not to cut off the 1/4″ seam at the point. Use an On-Point Ruler to square this up if you have one.
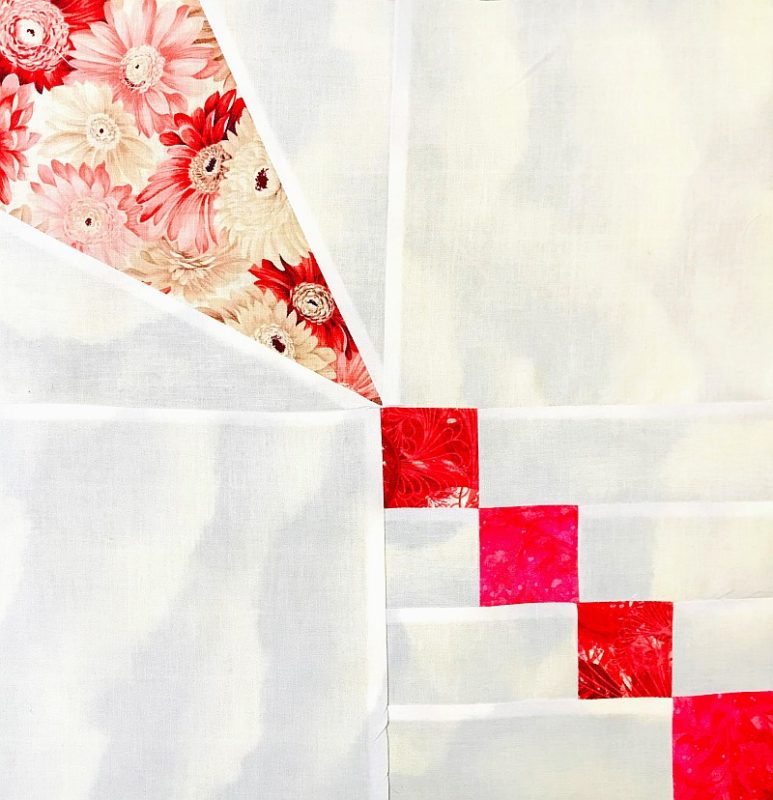
Creating the Catch that Kite Quilt Block
Sew the Kite Tail to the right of a 6-1/2″ Sky square.
Sew the Kite to the left of a 6-1/2″ Sky square. Sew the two sections together in a four-patch.
Press and square this up to 12-1/2“.
You are done! Enjoy!


thanks for a wonderful pattern
I don’t see a form to fill out.
It should have been almost to the bottom, just above the other designer links.
Always love the details you add for each block. Thanks so much!!